Showing posts with label Pearl Harbor. Show all posts

Friday, 7 July 2017

Revell Pearl Harbor Boeing P-26A Peashooter 1/72


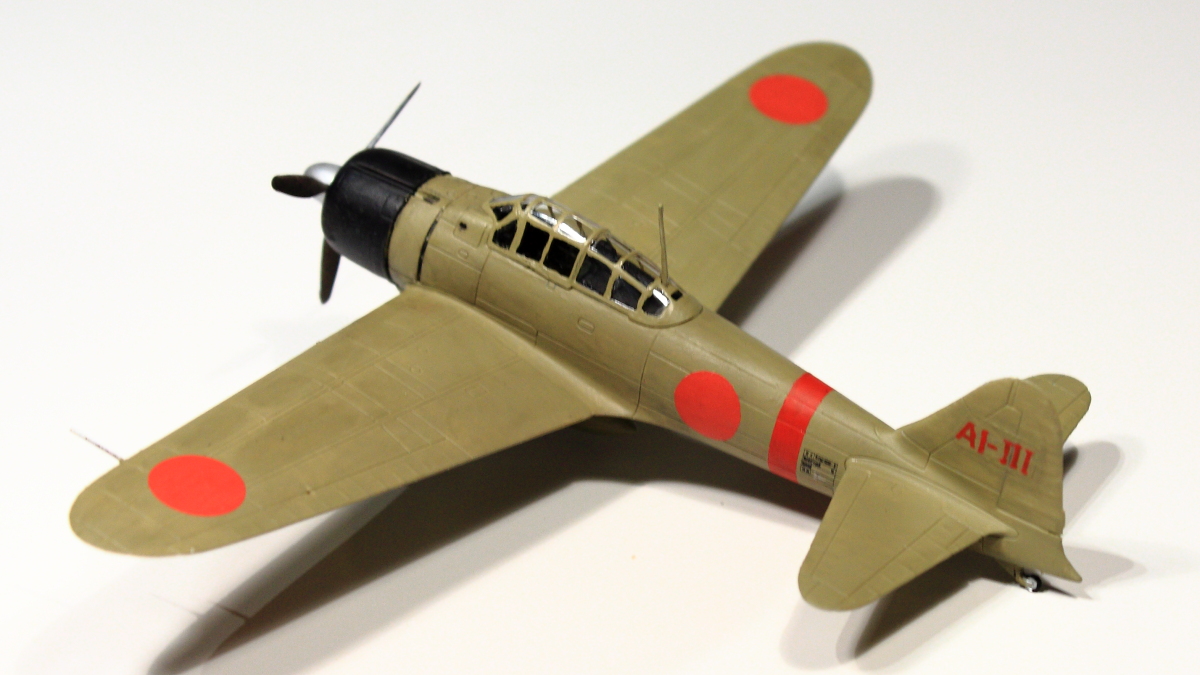
1/72nd scale Airfix new tooling Zero and Revell old tool Peashooter
A snappy little Revell kit of the (in)famous Boeing P-26A Peashooter keeping with the Pearl Harbor theme, these planes were already obsolete at that time and used as training and hack aircraft. This model represents a U.S.Army P-26A of the 18th Pursuit Group at Hawaii in Dec. 1941, painted in olive drab (Revell matt #46) and light grey (Humbrol #127). Finished with Revell matt clearcoat #2.

Scratchbuilt windshield (just couldn't use the original) but otherwise out-of-the-box with rivets and all, rigging done with fine fishing line. This kit had a copyright marking from the 80's but wouldn't be surprised if it was way older. Still, while not exactly accurate by today's standards it does sit in quite nicely with my other Airfix Pearl Harbor models!

Thursday, 22 December 2016

Airfix Akagi Pearl Harbor Trio: Zeke, Val and Kate

1:72 Scale Airfix Pearl Harbor Trio: A6M2b Zero 'Zeke' (new tooling), Aichi D3A1 'Val' (original), Nakajima B5N2 'Kate' (new kit).


Airfix Pearl Harbor Trio III: Kate

The new Airfix Nakajima B5N2 'Kate' is a very nice kit and a delight to build. Out-of-the-box with some little exceptions like tailcode letter "A" decal from a Hasegawa 1:200 DC-9-40 kit and steel wire pitot tube. 
My model represents the first wave Akagi torpedo bomber flown by a hikotaicho (overall torpedo plane leader) Lt. Cmdr. Shigeharu Murata. 


Nice engine, unfortunately nearly invisible in a finished model.

Only the wing roots needed some putty.

Hai-ryokushoku base ready for freehand airbrushing.

 Revell Matt 39 Dark Green topcoat.

Cockpit ready for glazing.
Airfix #04058 1:72 Nakajima B5N2 'Kate' box top.


Monday, 18 January 2016

Airfix Pearl Harbor Trio II: New tool 'Zeke'

If the Tamiya 1/72 Zero was a really, really nice kit this Airfix new tool Zero is practically as fine but considerably cheaper. Especially when built with a closed canopy both kits look like they should. Of course Tamiya has the open cockpit option and details are little crisper and a bit more delicate, not to mention it's definitely easier to build, but all these features come with a price tag. 
Out-of-the-box except replaced pitot tube and tail number decal - because I wanted a Pearl Harbor one the AI-111 was obviously the easiest to make with cut-and-paste - so this model represents the Akagi fighter piloted by F1c Shinpei Sano of the second wave attack.  
Paint shades (same as my PH 'Val') and other decisions were made with the help of these websites:
Still, I'm afraid my model is just a best guess about many details...


Fuselage nose top panel is a good idea that works well.


Basic painting done

Airfix GR3 Harrier as a donor sheet for AI-111

After some touch-up

Ready for decaling with Johnson Pledge floor wax (The Finnish version!)

Wednesday, 6 January 2016

Airfix Pearl Harbor Trio I: 'Val'


I saw three Japanese plane profiles in a high school history textbook and thought it would be nice a nice project for old and new Airfix 1/72 kits. So here's my interpretation of Aichi D3A1 Model 99 'Val' dive bomber in Akagi Pearl Harbor hikotaicho markings, the crew were PO1c Kiyoto Furuta (pilot) and Lt. Takehiko Chihaya (gunner/radioman). Mostly out-of-the-box except the lower two tail red stripes picked from my decal stash and original AI-201 black decal hand painted red. Nice kit otherwise with the usual exceptions of canopy and some parts fit. Yet it was cheap and fun even for a second-hand kit (just a couple of £'s GBP) and the Aichi D3A1 shapes are certainly there.


Airfix 1980 reissue #902014 Aichi D3A1 'Val'

Original decal sheet except the tail number for 'AI-201' hand painted red

Dive brakes, note ejector pin markings and some flash
1960's idea of a scale model cockpit interior
Airfix copyright 1965 inside the wing
I was tempted to use this painting diagram, but decided to go for a bit more realistic version of the basic out-of-the-box build
Minimum # of parts, but just enough I think


Is this supposed to be a 96 model bomb? Going to use it anyway!
 
Never been afraid with the filler tube, never will...

Fortunately the upper sides match better!

Left stabilizer painted with Revell 380 with some gloss 04 white added, right stabilizer with a little further matt 39 mix, trying to simulate this actual aileron fabric sample